
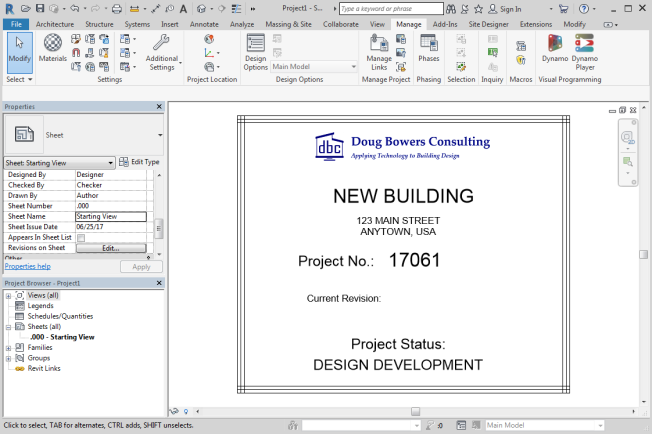
It is pretty typical for organizations to utilize the Starting View function within Revit and use that view to show project information. That information often includes project name, project number, project address, and other important data. Ideally, some of that information would be displayed using the same project parameters as used in title blocks to maintain consistency. It can.
I believe that using a starting view is “good BIM” and good utilization of the starting view is very important. It can help the model load more quickly and give the user important information about the project since it will be the first view seen when opening the project file.
Many organizations use a drafting view as their starting view. When using a drafting view, project parameters cannot be used since labels are not allowed in a drafting view. A “Label” is needed in order to use a parameter and are used in families. If a drafting view is used, regular text needs to be used for the information.
A good method to use project parameters in your starting view is to utilize a sheet with a custom title block for the starting view.
With this process, the custom title block for the special sheet actually contains the project parameters that you desire, as well as any desired sheet parameters.
Create the custom title block and sheet:
- Create a new title block family using the provided title block template. You can choose any size title block and then change the size as desired when modifying the family.

- In the title block family, add any line work and graphics that you desire, which typically includes your company logo image.
- For any project parameters or sheet parameters that are desired, use a label and specify the desire parameters in the label.
- Add any text to the view that may be desired.

- Save the title block family and add it to your project template.
- In the project file, create a new sheet and select this new custom title block for the sheet.
- Make sure that you remove the checkmark in the Properties dialog box for the “Appears in Sheet List” parameter for the starting view sheet so that it does not appear in the sheet list on your cover sheet.
Set the sheet as the Starting View:
- Go to the Manage tab, and select the Starting View command from the Manage Projects panel.
- In the Starting View dialog box, select the custom starting view sheet that was created for this purpose then select the OK button.
Comments:
The above information shown on the starting view is a basic general idea of what can be shown on a starting view and created just for this article. Other ideas for information include, but are not limited to:
- Contact information for project team members of various disciplines working on the project, both internal and external
- Coordinate information
- Revit version
- Drawing submission dates – both past and upcoming
- Date of most recent project archive
- File name
- Any project announcements that the project team should see when they open the project file.
- Last time the file was audited
Information not utilizing parameters can be placed directly on the sheet view and not in the title block family.
